The Real Reason You're Not Flexible (Yet)
When I first started stretching in my mid-20s, I thought flexibility meant forcing my forehead to my knees, no matter how much it hurt. I bounced, I pushed, I held my breath. And after three weeks of that, my hamstrings felt tighter than when I began. I almost quit.
What I didn't understand then is that flexibility isn't about brute force. It's a skill your nervous system learns, not a rubber band you snap into shape. The beginner stretching routine for flexibility that finally worked for me wasn't a magical 10-minute video. It was a system that respected my body's limits, taught me to breathe, and progressed slowly.
This guide is that system. It's not just a list of stretches - it's a 4-week roadmap designed for absolute beginners, especially those who feel stiff, anxious, or have tried and failed before. You'll learn why you're stuck, how to start safely, and exactly how to progress without pain.
The Beginner's Flexibility Roadmap: A 4-Week System
Here's the core idea: instead of doing 20 different stretches randomly, you'll follow a progressive plan that builds both physical range and neural control. Each week has a specific focus, and every session includes the same three pillars: breathing, gentle movement, and a sustained stretch.
You'll need a mat or a soft surface, a timer (your phone works), and a wall. That's it. No fancy equipment, no yoga blocks required (though we'll talk about props later).
Before we dive into the weekly plan, let me give you the single most important piece of advice: never stretch a cold muscle. Spend at least 3-5 minutes warming up with light walking, marching in place, or arm circles. This isn't optional - it's the difference between a productive session and an injury.
The 5-Minute Warm-Up That Preps Your Body
Do this before every session:
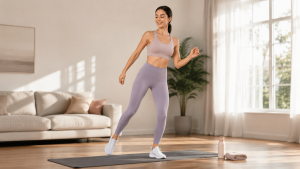
- March in place for 60 seconds, swinging your arms.
- Roll your shoulders backward 10 times, then forward 10 times.
- Do 10 slow body-weight squats (or sit-to-stands from a chair).
- Gently twist your torso side to side, letting your arms follow.
This raises your core temperature and sends blood to the muscles you're about to stretch. It's been shown that warm muscles are more pliable and less prone to injury.
Week 1: Learn to Breathe and Release
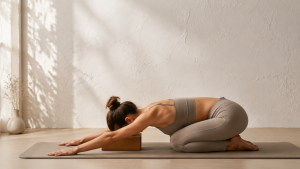
Your first week is about two things: finding your edge (that point of mild tension, not pain) and connecting your breath to your movement. Forget about touching your toes. Instead, you'll practice three stretches that target the most common tight areas: hamstrings, hips, and shoulders.
Each session should take 15 minutes. Do this every other day - three to four times per week.
Stretch 1: Supine Hamstring Stretch (with a strap or towel)
Lie on your back with both knees bent. Loop a towel around the ball of your right foot. Slowly straighten your right leg toward the ceiling, keeping your left heel on the floor. You should feel a gentle pull behind your thigh. Breathe in for 4 counts, then exhale for 6 counts. With each exhale, let your leg lower a bit - but don't force it. Hold for 30 seconds, then switch sides.
Most people make the mistake of holding their breath when they feel tension. That's exactly wrong. Your exhale tells your nervous system it's safe to relax. I learned this the hard way - when I held my breath, my muscles would tighten and resist. The moment I started exhaling slowly, my range improved within a week.
Stretch 2: Hip Flexor Lunge (Kneeling)
Kneel on your left knee, with your right foot flat on the floor in front of you, knee bent at 90 degrees. Keep your torso upright. Gently press your hips forward until you feel a stretch in the front of your left hip. Place your hands on your right knee for balance. Breathe and hold for 30 seconds. Switch sides.
If kneeling hurts your knee, place a folded towel or pillow under that knee. This stretch is crucial because most of us sit all day, and tight hip flexors pull on your lower back.
Stretch 3: Shoulder Cross-Body Stretch
Stand or sit tall. Bring your right arm across your chest, keeping it straight. Use your left hand to gently pull your right arm closer to your body. You should feel a stretch in the back of your shoulder. Keep your right shoulder down, not shrugging. Hold for 30 seconds, then switch.
This one seems simple, but it's easy to overdo. If you feel a pinch in the front of your shoulder, ease off - that means you're compressing the joint, not stretching the muscle.
Your Week 1 Schedule
- Day 1: Warm-up + 3 stretches (one set each side)
- Day 3: Warm-up + 3 stretches (two sets each side)
- Day 5: Warm-up + 3 stretches (two sets each side)
- Day 7: Optional gentle session if you feel good
Focus on your breathing. If you can't hold for 30 seconds, start with 15. There's no shame in that. The goal is consistency, not intensity.
Week 2: Build the Habit and Lengthen the Big Muscle Groups
Now you're comfortable with the basics. This week, you'll add two more stretches and increase your hold time to 45 seconds. You'll also start to pay attention to your body's signals - the difference between a stretch and a strain.
Most people don't realize that flexibility gains are largely neurological. Your nervous system decides how far your muscles can stretch based on safety signals. When you push too hard, your brain screams "danger" and tightens the muscle. By holding a comfortable stretch and breathing, you gradually teach your brain that this range is safe.
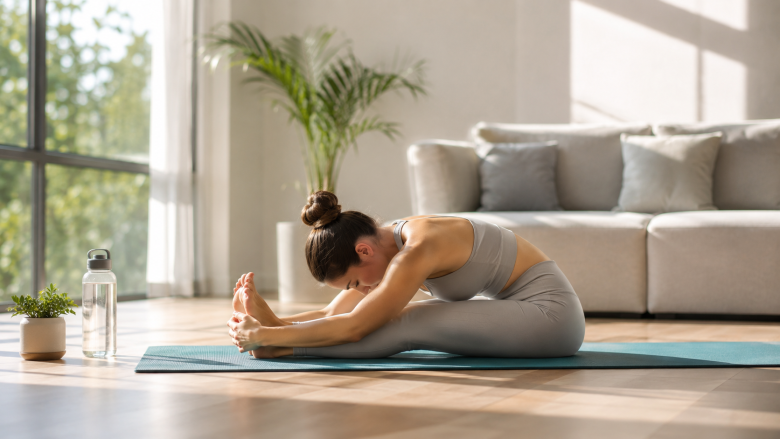
Stretch 4: Seated Forward Fold (Modified)
Sit on the floor with your legs extended in front of you, but bend your knees slightly so your back is straight. Hinge at your hips and reach your hands toward your shins or knees. Don't round your back. You should feel a stretch in your lower back and hamstrings. If you can't reach your shins, use a towel around your feet. Hold for 45 seconds, breathing deeply.
A common mistake is rounding your back to get your hands farther. That shifts the stretch to your spine instead of your hamstrings, and it can strain your lower back. Keep your chest lifted and your spine long.
Stretch 5: Butterfly (Hip Opener)
Sit with the soles of your feet together, knees dropped out to the sides. Hold your ankles with your hands. Gently press your knees toward the floor - but only to a comfortable point. You'll feel this in your inner thighs. If your knees are very high, that's fine. Place cushions under your knees for support. Hold for 45 seconds.
This stretch is amazing for tight hips, but it's also a mental game. Many people bounce their knees up and down. Don't bounce - that's a fast track to injury. Instead, let gravity do the work, and breathe.
Your Week 2 Schedule
- Same frequency: 3-4 sessions per week, every other day.
- Do all 5 stretches in a row, one set each side.
- Hold each for 45 seconds, with a 15-second rest between.
You'll also start to notice which stretches feel easier. That's a sign to deepen slightly - but only by 10-20%. Never chase a number. Listen to your body.
Week 3: Add Range and Start to Combine Stretches
By week three, you should feel a noticeable difference in how your body moves. Now we'll add one more stretch and start doing a simple flow that links several positions together. This builds flexibility and mobility - the ability to move through your range with control.
Flexibility and mobility are often confused. Flexibility is the passive range of motion (how far you can stretch). Mobility is the active range (how far you can move under your own strength). Both matter. You need flexibility to get into a position, and mobility to use it safely. We'll address both in this week's routine.
Stretch 6: Standing Quad Stretch
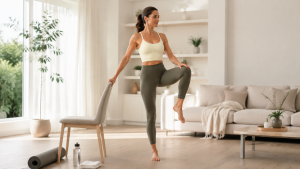
Stand near a wall for balance. Bend your right knee and bring your heel toward your buttock. Grab your right ankle with your right hand. Keep your knees together and your hips forward. You should feel a stretch in the front of your thigh. If you feel a pull in your knee, ease off. Hold for 30-45 seconds, then switch.
This stretch is notorious for causing knee pain when done wrong. The key is to keep your knee pointing straight down, not out to the side. Also, don't pull your foot too hard - just let it rest in your hand.
The Mini Flow: Cat-Cow to Downward Dog
This is a simple sequence that combines spinal flexion and extension with a classic stretch. Start on your hands and knees. Inhale, drop your belly, and lift your chest and tailbone (cow pose). Exhale, round your back, tuck your chin (cat pose). Repeat 5 times. Then, tuck your toes and push your hips up and back into a modified downward dog - knees bent if needed. Hold for 20 seconds, then return to hands and knees. Repeat the whole sequence 3 times.
This flow warms your spine, opens your shoulders, and stretches your hamstrings. It's a great way to integrate flexibility into movement, which prepares your body for real-life activities.
Your Week 3 Schedule
- Do the 5 stretches from week 2, but reduce hold time to 30 seconds each (so you can fit more variety).
- Add the standing quad stretch and the mini flow.
- Total session: about 20-25 minutes.
You might notice that some stretches feel tighter than others. That's normal. Don't skip the ones you hate - those are the ones you need most.
Week 4: Push Your Edge Without Crossing It
This final week is about refining your technique and learning to distinguish between a good stretch and a bad one. You'll do all 7 stretches, but you'll also learn to "breathe into" the tension. This is where real progress happens.
Here's a technique I teach all my clients: the exhale-assisted deepening. In each stretch, after you settle into the position, take a slow inhale, then on the exhale, gently try to relax the area further. For example, in the hamstring stretch, as you exhale, let your leg sink a tiny bit more. You're not forcing anything - you're simply using the relaxation response to allow your muscle to lengthen.
This is the opposite of bouncing, which fires up your stretch reflex and causes your muscle to contract. Bouncing is the most common beginner mistake, and it's why so many people never get more flexible. They're fighting their own nervous system.
Full Session for Week 4
- Warm-up (5 min)
- Supine hamstring stretch (45 sec each side)
- Hip flexor lunge (45 sec each side)
- Shoulder cross-body (45 sec each side)
- Seated forward fold (45 sec)
- Butterfly (45 sec)
- Standing quad (30 sec each side)
- Cat-cow to downward dog (5 rounds)
Do this 4 times this week, with at least one rest day between sessions. By the end of the week, you'll have a solid baseline. But the real key to flexibility is not this 4-week plan - it's what you do after.
The Mistakes That Keep Beginners Stuck
Even with a great routine, most beginners sabotage themselves with a few common errors. Here are the ones I see in my own practice and with students:
- Holding your breath. You need to breathe deeply and rhythmically. If you're holding your breath, your muscles won't relax. Practice exhaling as you ease into each stretch.
- Bouncing or jerking. This triggers the stretch reflex and can cause small tears. Always move slowly and smoothly.
- Stretching through sharp pain. A mild pulling sensation is normal. Sharp, stabbing, or shooting pain is a warning. Stop immediately.
- Skipping the warm-up. Cold muscles are like cold taffy - they'll snap. Always warm up for at least 5 minutes.
- Comparing yourself to others. Your body is unique. Yesterday's flexibility isn't today's benchmark. Accept where you are.
Another mistake is thinking that more is always better. Overstretching can lead to joint instability and injury. You want to stretch to a 6 or 7 out of 10 intensity, not a 9 or 10.
Flexibility vs. Mobility: Why You Need Both
As I mentioned earlier, flexibility is passive range, mobility is active control. You can be flexible but not mobile - like someone who can do the splits but can't lift their leg without falling over. Conversely, you can be mobile but not flexible, like a dancer who can kick high but can't touch their toes.
For beginners, the goal is to improve both. The routine above does this by including static stretches (flexibility) and flowing movements (mobility). If you want to go deeper, you'll need to add strength training at the end range of your stretches. That's beyond this beginner guide, but it's something to keep in mind as you progress.
For now, focus on the basics. And don't forget that flexibility isn't just about your body - it's about your nervous system. The more you practice relaxing into a stretch, the faster your brain will learn to allow that range.
How Often Should You Stretch? And How to Recover
Most beginners ask how many days per week they should stretch. The answer is: 3-4 days is ideal, with at least one rest day between sessions. This gives your muscles time to repair and adapt. Stretching every day can actually be counterproductive if you're pushing too hard, because your muscles need recovery time.
You'll also need to watch for soreness. A mild muscle ache after stretching is normal, especially if you're new. But if you feel sharp pain or joint discomfort, that's a sign you've overdone it. In that case, take 2-3 days off and reduce the intensity next time.
Recovery also includes hydration and sleep. Stretching creates tiny micro-tears in your muscle fibers (this is good - it stimulates growth), and your body repairs them while you sleep. Drink plenty of water and aim for 7-9 hours of sleep.
If you're stretching in the morning, consider pairing it with a gentle wake-up routine with stretches and breathing to set a calm tone for your day. That guide has additional breathing exercises that complement what I've shared here.
Adaptations for Very Stiff Bodies: Props and Regressions
If you're extremely stiff, you might feel like some of these stretches are impossible. Don't worry - there are ways to modify every single one.
- Use a yoga strap or towel. In the hamstring stretch, wrap it around your foot to bridge the gap between your hand and leg.
- Sit on a cushion. In the seated forward fold, place a folded blanket under your hips to tilt your pelvis forward. This makes the stretch easier and protects your back.
- Bend your knees. In any hamstring or forward fold, keep a generous bend in your knees. You'll still get a stretch, just less intense.
- Place a pillow under your knee. In the hip flexor lunge, this takes pressure off your kneecap.
- Use a wall for balance. In the standing quad stretch, keep one hand on a wall to avoid wobbling.
Regressions aren't cheating - they're smart. Think of them as training wheels. You'll gradually remove them as you gain range.
Also, if you have a specific injury or condition, consult a physical therapist before starting any stretching program. This is especially important if you have osteoporosis, herniated discs, or recent surgery.
Your Next Step: Consistency Over Intensity
By now, you have a complete beginner stretching routine for flexibility that goes beyond a simple list. You have a 4-week progression, breathing cues, common mistake fixes, and adaptations. The only thing left is to start.
Here's my honest advice: don't aim for perfection. Aim for showing up. Even if you only do 10 minutes on a busy day, that's better than nothing. And don't get discouraged if you don't see dramatic changes in two weeks. Flexibility is a slow, steady journey. Most people quit too early because they expect overnight results.
I've been stretching for years, and I still have tight days. The difference now is that I know how to work with my body instead of against it. You'll get there too.
If you're looking to build a more complete morning habit, consider our calming morning routine at home - it pairs well with stretching and helps you stay consistent. Start today, and remember: breathe, move gently, and trust the process.