Why Low-Impact Cardio Matters More Than You Think
I remember the first time I tried to start a home cardio routine. I was 25, out of shape, and convinced that if I wasn't dripping sweat and gasping for air, I wasn't working hard enough. I jumped into a high-impact workout, landed wrong on a jumping jack, and spent the next week hobbling around with a sore knee. That experience taught me something crucial: sustainable fitness isn't about how hard you can push on day one. It's about building a foundation that lets you keep moving for years.
Low-impact cardio workouts for beginners at home are exactly that foundation. They raise your heart rate, improve circulation, and burn calories without punishing your joints. But here's the thing nobody tells you: low-impact does not mean low-effort. You can absolutely get your heart pumping and your lungs working without ever leaving the ground. The key is knowing how to structure your movement, pace yourself, and progress safely.
This guide is built around a 30-day progression plan. It's not a random list of exercises. It's a week-by-week system that takes you from absolute beginner to someone who can sustain 20-30 minutes of steady cardio with confidence. We'll cover form cues, modifications for joint pain, recovery strategies, and the honest truth about calorie burn. By the end, you'll have a routine that fits into your life and actually sticks.
The First 30 Days: A Week-by-Week Blueprint
This plan assumes you have no equipment, but I'll also share options for adding light resistance (like a kettlebell or dumbbell) if you want to increase intensity later. The structure is simple: three sessions per week in weeks 1-2, then four sessions per week in weeks 3-4. Each session includes a warm-up, the main workout, and a cool-down. Consistency is more important than intensity right now.
Week 1: Foundation and Form
Your goal for week one is not to get tired. It's to learn how to move with control. I made the mistake of rushing through the first week, and I ended up with sloppy form that I had to unlearn later. Focus on these four moves:
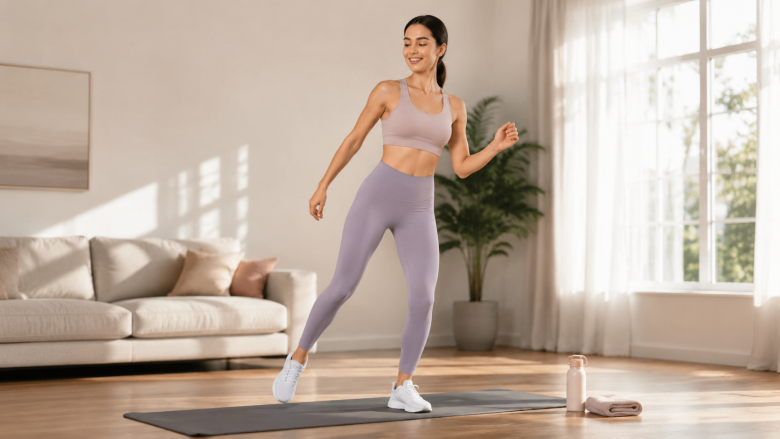
- Marching in place - Lift your knees to hip height, keep your soft knees (never locked), and land softly through your midfoot. Swing your arms opposite to your legs.
- Step touch - Step to the side and bring your feet together. Keep your pelvis neutral (tuck your tailbone slightly) to avoid lower back strain.
- Heel digs - Extend one leg forward, tap your heel, then return. Maintain a slight bend in your standing knee.
- Side taps - Tap your toe to the side, keeping your weight on the standing leg. This builds lateral stability.
Perform each move for 30 seconds, then rest 30 seconds. Repeat the circuit twice. That's your first session. Total time: about 8 minutes. If you feel any sharp pain, stop and check your form. The most common mistake is locking your knees during marching - keep them soft.
Week 2: Adding Duration and Coordination
Now you'll increase the work time to 40 seconds per move, with 20 seconds of rest. Add two new moves: modified knee lifts (slow, controlled lifts to hip height) and standing twists (rotate your torso while keeping your hips stable). Here's the weekly schedule:
- Session 1: Marching, step touch, heel digs, side taps - 40s on, 20s rest, 2 rounds.
- Session 2: Modified knee lifts, standing twists, step touch, heel digs - same timing.
- Session 3: Repeat session 1 or 2, whichever felt more challenging.
One thing I learned the hard way: don't hold your breath. It's natural to tense up when you're concentrating, but low-impact cardio works best when you breathe rhythmically. Inhale through your nose, exhale through your mouth, matching your breath to your movement. For example, on a step touch, inhale as you step out, exhale as you bring your feet together.
Week 3: Introducing Light Impact and Sequencing
You'll now do four sessions per week. The moves get slightly more dynamic, but still all low-impact. Add these: alternating toe taps (tap your toe forward and back, alternating feet) and gentle arm circles (small circles forward and backward). Keep your shoulders relaxed, not hunched up to your ears. The sequence is a 30-second work, 15-second rest cycle, with 3 rounds of each move. Total session time: around 15 minutes.
You can also try adding a light kettlebell or dumbbell (5-10 lbs) for the heel digs and step touches. Hold it in front of your chest with both hands. This increases the cardio demand without increasing impact. I've seen people grab a 5-pound kettlebell and immediately feel the difference in their heart rate. But only do this if you feel stable and pain-free.
Week 4: Building Endurance and Interval Variety
Now you're ready for a simple interval structure: 45 seconds of work, 15 seconds of rest, for 4 rounds of each move. Choose 4-5 moves from the previous weeks that you enjoy most. Mix them in a circuit: marching, step touch, heel digs, standing twists, and alternating toe taps. If you're feeling good, add a short burst of faster marching (but still controlled) for the last 15 seconds of each work interval. This creates a subtle intensity spike without impact.
By the end of week 4, you should be able to complete 20 minutes of continuous movement with proper form. That's a huge milestone. You might not be dripping sweat, but your heart rate should be elevated, your breathing faster, and your muscles slightly fatigued. This is the sweet spot for building cardiovascular endurance without injury.
Form Cues That Protect Your Joints
When I work with beginners, the most common question is, "How do I know if I'm doing this right?" Here are the non-negotiable cues that apply to almost every low-impact cardio move:
- Soft knees: Never lock your knees. Keep a micro-bend at all times. This absorbs shock and protects your patella.
- Neutral pelvis: Imagine you have a tailbone and you're trying to tuck it slightly under you. This prevents your lower back from arching excessively, which can cause pain over time.
- Weight on midfoot: Avoid landing on your heels (which jars your knees) or your toes (which strains your calves). Land softly on the middle of your foot.
- Active arms: Swing your arms naturally, not across your body. Keep your elbows at about 90 degrees. If your arms are floppy, you're losing momentum.
One thing most people don't realize: your shoes matter even at home. I once did a 20-minute session in bare feet on a hardwood floor and ended up with plantar fasciitis. Wear supportive athletic shoes or a minimalist shoe with good grip. If you're on a carpet, you can go barefoot, but be careful with sliding.
Modifications for True Beginners or Joint Pain
Not everyone can start with the full range of motion. If you have knee, hip, or lower back issues, here are regressions for each move:
- Marching in place: Instead of lifting your knee to hip height, just lift your heel a few inches off the ground. Focus on the rhythm.
- Step touch: Reduce the step width to a few inches. You can also tap your foot instead of fully stepping out.
- Heel digs: Keep your heel on the ground and just tap it forward - no need to lift your entire foot.
- Standing twists: Keep your feet hip-width apart and rotate only your upper body, with hands on hips for stability.
If you have a specific injury, consult a physical therapist before starting. I had a client with a torn meniscus who couldn't do any weight-bearing lunges, but she could do marching in place with a chair for support. The chair provides stability and reduces load on the knee. Place one hand on the back of a sturdy chair and perform the moves slowly.
Frequency, Recovery, and Realistic Results
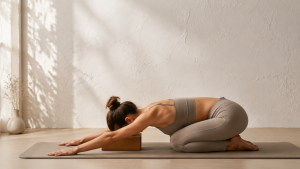
How many days per week should you do low-impact cardio? For a beginner, three days is the sweet spot. Your body needs time to adapt to the new movement patterns. On your off days, focus on gentle stretching, walking, or restorative yoga. Building a calming morning routine can also help your body recover - see our guide on How to Build a Calming Morning Routine at Home for tips on setting a consistent wake-up rhythm.
Recovery isn't just about rest days. It's also about sleep, hydration, and nutrition. Most beginners underestimate how much water they need. Aim for half your body weight in ounces of water per day (e.g., 150 lbs = 75 oz). Also, don't expect to burn 500 calories in a 20-minute session. Low-impact cardio at a moderate pace burns roughly 3-5 calories per minute for a 150-pound person. That's 60-100 calories in 20 minutes. That's fine - the goal is consistency, not a massive calorie deficit. Use a tool like our Scrubbing Calories For Beginners Calculator to get a more personalized estimate for various activities.
One myth I want to debunk: low-impact cardio is not a quick fix for weight loss. It's a long-term tool for building aerobic capacity, improving mood, and reducing injury risk. If you combine it with a balanced diet and strength training, you'll see changes over weeks and months, not days. The number on the scale might not move much at first, but your endurance will improve, your resting heart rate will drop, and you'll feel more energetic throughout the day.
Warm-Up and Cool-Down: The Non-Negotiables
Skipping a warm-up is like driving a car in first gear without pressing the clutch. You'll put unnecessary strain on your engine. A proper warm-up increases blood flow to your muscles and prepares your joints for movement. For low-impact cardio, a 3-5 minute warm-up should include:
- Ankle circles: 10 each direction, while standing.
- Hip circles: Hands on hips, rotate your hips in a slow circle, 5 each direction.
- Arm circles: Small circles forward and backward, 10 each.
- Gentle marching: Start with slow, low knee lifts for 1 minute.
The cool-down is equally important. After your main workout, spend 3-5 minutes doing static stretches: hold each stretch for 20-30 seconds without bouncing. Target your calves (downward dog or standing calf stretch), hamstrings (forward fold with bent knees), quads (standing quad stretch, holding onto a wall), and glutes (figure-four stretch).
I've seen people skip the cool-down and then complain about muscle soreness the next day. The truth is, a cool-down helps your heart rate return to baseline gradually and reduces the risk of dizziness. If you have high blood pressure or are on medication, this is especially important.
Equipment Alternatives: Kettlebell vs. No-Gear
You don't need any equipment for low-impact cardio. But if you want to add a challenge, here are three options:
- No gear: Perfectly fine. Use your body weight and arm swings to control intensity. Speed up your movements or add larger ranges of motion (e.g., higher knee lifts) to increase difficulty.
- Light dumbbells (1-5 lbs): Hold one in each hand while marching or doing step touches. This increases the load on your upper body and raises your heart rate. I like using 2-lb weights for arm circles and heel digs.
- Kettlebell (8-16 kg for women, 12-20 kg for men): A kettlebell is great for adding a lower-body focus. During marching, hold the kettlebell by the handle at chest height. This engages your core and shoulders. Do not swing it - keep it static. The weight should be heavy enough to make you work, but light enough that you can maintain good form.
When would you choose one over the other? If you're just starting and have no joint issues, no gear is ideal. If you want to build upper body endurance without adding impact, light dumbbells are a good progression. If you have access to a kettlebell and want to incorporate a core stability element, go for it. But never use a weight that forces you to compromise your form - that's how injuries happen.
Common Mistakes and How to Fix Them
After years of coaching beginners, I've seen the same patterns. Here are the most common mistakes and what to do instead:
- Mistake 1: Holding your breath. Fix: Count your breaths. Inhale for 2 steps, exhale for 2 steps. If you can't talk, you're going too hard.
- Mistake 2: Looking down at your feet. Fix: Keep your chin parallel to the floor. Looking down rounds your upper back and reduces oxygen flow.
- Mistake 3: Bouncing or jerky movements. Fix: Imagine you're moving through honey. Smooth, controlled transitions are safer and more effective.
- Mistake 4: Pushing through pain. Fix: Differentiate between muscle burn (okay) and joint pain (stop). If your knee or hip hurts, regress the move.
- Mistake 5: Doing too much too soon. Fix: Follow the 10% rule: don't increase your weekly volume by more than 10%. If you did 15 minutes total in week 1, do 16.5 minutes in week 2, not 30.
One thing I wish someone had told me: your body will adapt faster than you think, but only if you don't overdo it. The first 30 days are about building the habit, not the performance. On days when you feel tired, do a shorter session. Even 5 minutes is better than zero. Consistency stacks.
Tracking Your Progress Without Obsessing
You don't need a heart rate monitor or a fancy app. For the first 30 days, track two things: how many sessions you completed and how you felt during each session. Use a simple journal or a note on your phone. Rate your perceived exertion (RPE) on a scale of 1-10, where 1 is resting and 10 is an all-out sprint. Aim for an RPE of 4-6 during your workouts. That's a moderate effort where you can hold a conversation but feel slightly breathless.
After 30 days, you'll notice improvements: you can go longer without getting winded, your resting heart rate might drop by a few beats per minute, and you'll feel more confident in your movement. If you want a more precise estimate of calorie burn for different activities, check out our Biking Calories For Beginners Calculator - it's a useful tool for understanding how various cardio activities compare, even if you're not biking. And for a quick reference on how many calories you burn during a car commute (yes, sitting burns calories too), see our Car Calories For Beginners Calculator - it's a fun way to see that even low-level activity adds up.
The Truth About Calorie Burn and Weight Loss
I want to be honest with you: low-impact cardio is not the most efficient calorie burner. A 20-minute session might burn 60-100 calories for a 150-pound person. That's roughly the equivalent of a small apple. But that's not the point. The real benefit is that it improves your cardiovascular health, reduces stress, and builds a habit that keeps you active. If weight loss is your goal, focus on your diet first - a 300-calorie deficit from food is easier to achieve than a 300-calorie burn from exercise. Low-impact cardio complements that by boosting your metabolism and improving your mood, which can help you make better food choices.
One misconception is that you need to feel the burn to get results. That's false. Even light physical activity has significant health benefits. According to the CDC, adults should aim for at least 150 minutes of moderate-intensity aerobic activity per week. Low-impact cardio at home can easily fit into that recommendation. And it's sustainable - you can do it for decades without wearing out your joints.
When to Level Up
After 30 days, you might feel ready for more. Signs that you're ready to progress: you can complete the 20-minute session without feeling like you need a break, your RPE stays below 4, and you're bored with the same moves. At that point, you can:
- Increase the work intervals to 50 seconds on, 10 seconds off.
- Add a third round to the circuit.
- Introduce new moves like low-impact jumping jacks (feet stay on the ground, arms move) or side shuffles (small steps, no leap).
- Try a 10-minute session twice a day instead of one long session.
But remember: progression doesn't have to mean making it harder. It can also mean making it more enjoyable. Find a playlist that energizes you, or invite a friend to join via video call. The social aspect of working out can boost your motivation and accountability.
Final Thoughts: Your First 30 Days Will Change Your Relationship with Movement
When I started my own journey, I thought I had to suffer to get fit. Low-impact cardio taught me that movement can be gentle, consistent, and still effective. The first 30 days are about building trust with your body. You'll learn what feels good, what doesn't, and how to listen to your own signals. By the end of this plan, you'll have a routine that you can maintain for life - not just for a month.
Don't worry about being perfect. Some days you'll skip a session, and that's okay. The next day, just get back to it. The only failure is quitting entirely. You've got this.