Why 20 Minutes Is the Sweet Spot for Tai Chi Beginners
Most people assume you need an hour to "do tai chi properly." That's not true. When I first started, I couldn't hold a posture for more than 30 seconds without wobbling. My teacher told me: "Twenty minutes is the perfect length to build muscle memory without overwhelming your brain." And she was right.
In this guide, I'll walk you through exactly what happens inside a 20-minute beginner tai chi routine - not just the moves, but the structure, timing, and why each segment matters. You'll learn how to modify the routine for bad knees, tight hips, or balance issues. You'll also discover the three most common mistakes beginners make (I made all of them) and how to fix them before they become habits.
If you've been watching follow-along videos and feeling lost, this article turns passive viewing into an active learning tool. Let's break down the anatomy of a 20-minute tai chi session.
The 20-Minute Routine at a Glance (Timestamp Table)
Here's the structure I use and teach. It's designed to warm up your body, introduce core forms, challenge your balance, and then bring you back to calm. Print this table or keep it open on your phone.
| Time (Minutes) | Phase | Key Focus |
|---|---|---|
| 0-3 | Breathing & Centering | Standing meditation, belly breathing, spine alignment |
| 4-10 | Basic Forms (Warm-Up Flow) | Commencing Form, Part the Wild Horse's Mane, White Crane Spreads Wings |
| 11-15 | Balance & Weight Shifting | Single Whip, Repulse Monkey, Golden Rooster Stands on One Leg |
| 16-20 | Cool-Down & Integration | Closing form, gentle stretching, breath awareness |
This timing is flexible. If you need more time in the balance section, steal it from the cool-down. The goal is consistency, not perfection.
Minutes 0-3: Breathing and Centering (The Foundation)
Most beginners skip this step because they want to "get moving." The thing nobody tells you about tai chi is that the first three minutes determine the quality of the entire practice. If you start with scattered breath and a tense jaw, every move will feel forced.
Stand with feet shoulder-width apart, knees soft (not locked), arms hanging naturally. Close your eyes or soften your gaze. Take 6-8 slow belly breaths - inhale through the nose, feel your lower abdomen expand, exhale through the mouth like you're fogging a mirror. Your spine should feel long, as if a string is pulling the crown of your head upward.
Common mistake: Lifting the chest on the inhale. Instead, let the breath drop into the belly. I used to hike my shoulders up to my ears. A friend told me, "Imagine you're smelling a flower and then blowing out a candle." That visualization fixed my breathing in two days.
If you have lower back pain, bend your knees slightly more (a micro-squat) to take pressure off the lumbar spine. If standing is uncomfortable, you can sit in a chair with feet flat - the breath work is the same.
Alignment Check for the First 3 Minutes
- Head balanced over the spine, chin slightly tucked (not jutting forward).
- Shoulders rolled back and down, not hunched.
- Pelvis neutral - not tucked under or tilted forward.
- Knees aligned with second toes, not collapsing inward.
This phase is also a great time to release tension in your jaw. Let your tongue rest on the roof of your mouth, lips closed but teeth apart. Most people clench without realizing it.
Minutes 4-10: Basic Forms (Building the Vocabulary)
Now you move into the first set of tai chi forms. These are the building blocks of all longer routines. I'll describe three essential moves that you can string together. Do each slowly, with continuous, flowing motion - no jerky stops.
1. Commencing Form (Starting Position)
From the standing meditation, lift your arms forward to shoulder height, palms facing down, then press them down in front of your hips. Imagine you're pushing a floating ball underwater. This move teaches arm coordination with the breath: lift on the inhale, press on the exhale.
Do this, not that: Don't lock your elbows when you lift. Keep a soft bend. Don't let your wrists go floppy - keep them firm but not rigid.
2. Part the Wild Horse's Mane
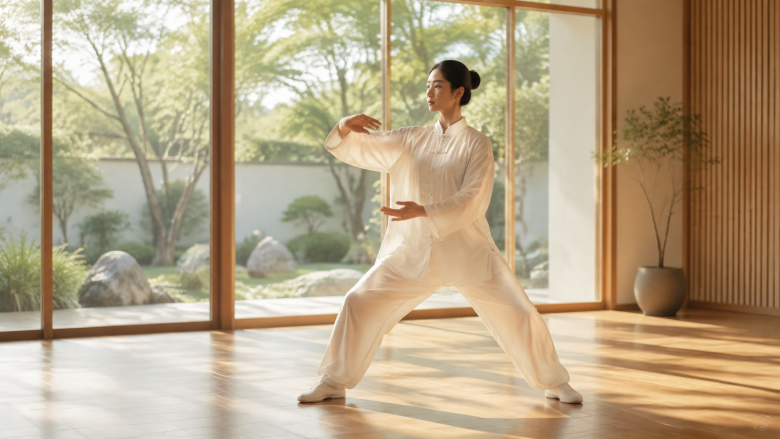
Step forward with your left foot into a slight bow stance (front knee bent, back leg straight but not locked). As you step, circle your left hand up to chest height, palm facing outward, and your right hand sweeps down near your hip. This looks like you're parting a horse's mane to the side. Then switch sides.
The most common mistake here is stepping too wide or too narrow. Your feet should be about hip-width apart, front heel aligned with back heel. When I first tried this, I stepped like a duck - wide and wobbly. My teacher had me draw chalk lines on the floor to mark my stance width. It felt silly, but it worked.
3. White Crane Spreads Wings
Shift your weight to your left foot, lift your right foot slightly, and bring both arms up - one arm overhead (like a crane's wing), the other arm down by your side. The movement is light and lifting. This form improves balance and opens the chest.
Modification for tight hips: If lifting your foot feels unstable, just lift the heel and keep the toes on the ground. You still get the hip-opening effect without the fall risk.
Repeat these three forms in a sequence for the remaining minutes. Do 2-3 repetitions on each side. The pace should feel like slow-motion walking through water.
Minutes 11-15: Balance and Weight Shifting (The Challenge)
This is where most beginners feel the wobble - and that's okay. The balance section is designed to expose weaknesses so you can strengthen them. Don't rush; wobbling is part of learning.
Single Whip
From a bow stance, turn your upper body to one side, extending one arm forward like you're pointing, while the other arm hooks behind you like a bird's tail. The key is to keep your hips facing forward even as your torso twists. This move teaches separation of upper and lower body movement.
Many people rotate their back foot too much. Keep the back foot at a 45-degree angle, toes pointing forward, not sideways. If you have knee pain, avoid twisting the knee - pivot from the hip instead.
Repulse Monkey
This is a backward walking move. Step back with one foot, shift your weight, and push both hands forward as if you're repelling a monkey. It's fantastic for balance and coordination because you're moving backward, which is less natural than forward walking.
What can go wrong: Looking down at your feet. I did this constantly and lost my forward awareness. Train yourself to keep your gaze level, using peripheral vision to sense your foot placement. Your brain will adapt after a few sessions.
Golden Rooster Stands on One Leg
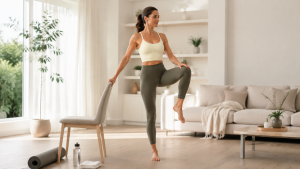
Stand on one leg, lift the opposite knee, and hold the position with your arms forming a circle in front of you. This is the most challenging form in the beginner routine. If you fall, laugh it off and try again.
Modification for seniors or those with balance issues: Keep the lifted foot's toes lightly touching the ground, or use a wall or chair back for support. Over time, reduce the contact until you can stand free.
During these five minutes, take a break if you feel dizzy. Tai chi can lower blood pressure, and some people experience lightheadedness when shifting weight quickly. Sit down, sip water, and resume when ready.
Minutes 16-20: Cool-Down and Integration (The Reward)
This is the most underrated part of the routine. The cool-down seals the practice and tells your nervous system, "We're done; you can relax now." Never skip it.
Closing Form
Return to the starting position. Bring your hands to your lower abdomen (dantian), palms overlapping (left hand over right for women, right over left for men - though this is a traditional guideline, not a hard rule). Take 3-5 deep breaths, feeling the energy settle.
Then slowly raise your arms overhead as you inhale, and as you exhale, let them float down to your sides. Repeat three times.
Gentle Stretching
Roll your shoulders forward and backward. Circle your neck slowly (half circles, not full rotations - full neck circles can compress the vertebrae). Gently shake out your hands and feet.
If you've been sitting at a desk all day, focus on opening your chest. Interlace your hands behind your back and lift them slightly. This counteracts the hunched-forward posture. For a deeper dive on morning flexibility, see our Easy 10-Minute Morning Routine for Better Focus - it pairs well with this tai chi session.
Final Breath
Stand still for one minute. Feel the difference between this stillness and the one you started with. Your body is warmer, your mind is quieter, and your breath is deeper. That's the gift of 20 minutes.
Common Alignment Mistakes (And How to Fix Them)
Even after years of practice, I still check my alignment. Here are the three issues I see most often in beginners:
1. Locked Knees
When you straighten your legs fully, the knee joint hyperextends, which causes strain over time. Keep a micro-bend at all times. Imagine you're standing on a slightly squishy surface - you never fully lock out.
2. Chicken-Winging the Elbows
In moves like Part the Wild Horse's Mane, beginners often lift their elbows too high, making the arms look like chicken wings. Keep your elbows slightly lower than your wrists, with a rounded, supported shape. Your armpits should feel open, not tight.
3. Collapsing the Lower Back
When you bend your knees, it's tempting to tuck your pelvis under, which flattens the lumbar curve. Instead, keep your tailbone slightly dropped (like you're sitting on a stool) while maintaining the natural curve of your lower spine. This protects your back and allows free movement of the legs.
How to Progress Beyond Day One
Many beginners do this routine for a week, feel great, and then wonder, "What's next?" Here's a simple progression:
- Week 1-2: Focus on the 20-minute routine exactly as written. Don't add new moves yet. Learn the forms and the breathing.
- Week 3-4: Increase the balance section to 6 minutes (minutes 11-16) and reduce the cool-down by 1 minute. This challenges your stability.
- Month 2: Add one new form - Brush Knee and Push - after the basic forms. Extend the routine to 22 minutes.
- Month 3 onward: Start combining all the forms into a continuous sequence without pauses. The goal is to make the entire 20 minutes flow like a single movement.
Most people don't realize that tai chi's real power comes from repetition, not variety. Doing the same six forms daily for three months will transform your balance and relaxation more than learning 20 different forms once each. Be patient with the process.
Modifications for Specific Needs
Bad Knees
Avoid deep stances. Keep your front knee bend at no more than 90 degrees (thigh parallel to the ground). If that hurts, reduce the bend. Never let your knee go past your toes. Use a wider stance to reduce load on the knee joint. Also, when stepping, keep your foot flat on the ground until you shift weight - don't pivot on the ball of the foot.
Seniors or Frail Beginners
Use a chair for support. Hold the back of a sturdy chair with one hand for balance during the balance section. For the balance forms, keep both feet on the ground and just shift weight rather than lifting a foot. The benefits of tai chi - improved balance, reduced falls - are still effective even with these modifications. A 2019 study from the Journal of the American Geriatrics Society found that adapted tai chi reduced fall risk by 43% in older adults.
Tight Hips
Most of the forms open the hips, but if you're extremely tight, slow down the weight shifts. Spend an extra breath in each stance. After the routine, add a few minutes of hip circles (standing, hands on hips) to release tension. If you find that 20 minutes is too long, start with a shorter session like our 5-Minute Gentle Stretches After Waking - it's a perfect warm-up before tai chi.
What to Do When You Don't Feel Like Practicing
Motivation ebbs and flows. I've had days where I dragged myself to the mat, did the first three minutes of breathing, and felt like quitting. On those days, I tell myself: "Just do 5 minutes. If you still want to stop, you can." Almost always, I end up doing the full 20. The hardest part is starting.
If you're dealing with illness or injury, skip the balance section entirely. Do only the breathing and the basic forms. The cool-down is non-negotiable - it's the most restorative part.
Another strategy: pair your practice with a daily habit. I do tai chi right after my morning coffee while the kettle is still warm. The routine becomes automatic after two weeks.
Conclusion: Your 20 Minutes, Your Practice
The 20-minute routine I've shared here is a template, not a rulebook. Adjust the timing, modify the moves, and respect your body's limits. The most important thing is to show up. Over time, you'll notice changes: you'll stand taller, breathe deeper, and react to stress with more calm.
If you're looking for a structured way to track your progress, consider using a simple journal. Note how you felt before and after each session, any wobbles, and one thing you want to improve. This transforms your practice from a passive video follow-along into an active learning journey.
Now roll out your mat (or just clear a spot on the floor), set a timer for 20 minutes, and start with three deep breaths. You've got this.