Why This 10-Minute Routine Is Different
If you have spent eight hours hunched over a keyboard, the last thing you need is a yoga routine that asks you to force your heels to the floor in Downward Dog or crank your neck into a deep backbend. Most beginner videos show a lovely flow, but they rarely warn you about the rounded back that turns Downward Dog into a shoulder strain, or the way tight hamstrings can make Forward Fold feel like you are being pulled apart. I have been there. When I first started yoga, I followed a popular 10-minute video and ended up with a sore lower back because I was trying to copy the instructor's range of motion instead of listening to my own body.
This 10-minute beginner yoga routine at home is designed specifically for desk workers. Every pose includes three things: a clear alignment cue, a common mistake to avoid, and a modification using household props like a chair or a towel. I also give you a one-line breath cue for each pose, because breath is the anchor that keeps you safe. By the end of this article, you will have a routine you can repeat for two weeks, plus a simple progression to add three more poses once you feel ready.
This flow pairs perfectly with the gentle wake-up stretches we covered in our Gentle Wake-Up Routine with Stretches and Breathing - use it right after your morning stretch or as a midday break.
What You Will Need (and What You Will Not)
For this routine, you need nothing more than a yoga mat (or a carpeted floor), a chair, and a hand towel. That is it. No blocks, no straps, no fancy equipment. The chair is for modified standing poses and for seated hip openers. The towel can be rolled up to support your knees or wrists.
Most people do not realize that a simple dining chair can be a game-changer for tight hamstrings. If your hamstrings are so tight that you cannot touch your toes without rounding your lower back, a chair gives you a way to fold without strain. The thing nobody tells you about yoga for desk workers is that the real enemy is not flexibility - it is the habit of holding tension in the neck and shoulders. This routine directly addresses that.
The 10-Minute Routine: Step-by-Step
Perform each pose for roughly 45 seconds to 1 minute, moving with your breath. The entire sequence should take about 10 minutes. If you need more time in any pose, take it. There is no rush.
1. Cat-Cow Stretch (Marjaryasana to Bitilasana)
Alignment cue: Start on hands and knees, wrists directly under shoulders, knees under hips. Inhale as you drop your belly and lift your chest and tailbone (Cow). Exhale as you round your spine like a Halloween cat, tucking your chin to your chest (Cat). Move slowly, feeling each vertebra.
Common mistake: Dropping the head back too far in Cow, which compresses the neck. Instead, keep your neck long - just lift your gaze slightly, not all the way up.
Modification: If your wrists hurt, make fists and rest on your knuckles, or place a folded towel under your palms to change the angle.
Breath cue: Inhale Cow, exhale Cat.
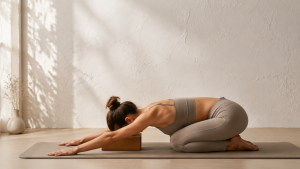
2. Child's Pose (Balasana)
Alignment cue: From hands and knees, sit back on your heels and lower your chest toward the floor. Extend your arms forward or rest them alongside your body. Let your forehead rest on the mat or a towel.
Common mistake: Lifting the hips too high or forcing the forehead to the floor. If your hips are tight, place a rolled towel under your thighs to create space.
Modification: For a wider stretch, bring your knees wider apart. For a more restful version, place a pillow under your chest.
Breath cue: Breathe deeply into your back body, imagining your spine lengthening with each exhale.
3. Downward-Facing Dog (Adho Mukha Svanasana)
Alignment cue: From hands and knees, tuck your toes and lift your hips up and back. Keep your knees slightly bent if your hamstrings are tight. Press your hands firmly into the mat, spread your fingers, and keep your head between your arms (not hanging).
Common mistake: Rounding the lower back to try to straighten the legs. This puts strain on the lumbar spine. The fix: keep your knees bent, and focus on lengthening your spine rather than straightening your legs.
Modification: Place your hands on a chair seat instead of the floor to reduce the angle. Or do a puppy pose (knees on the floor, walk hands forward, chest toward the floor) as a gentler alternative.
Breath cue: Inhale as you lift your hips, exhale as you press your chest toward your thighs.
4. Standing Forward Fold (Uttanasana) with Chair
Alignment cue: Stand with feet hip-width apart, a chair in front of you. Fold forward, placing your hands on the chair seat. Keep a slight bend in your knees. Your spine should be long, not rounded.
Common mistake: Locking the knees and rounding the back. The chair prevents you from going too deep. If you feel a sharp pull in your hamstrings, bend your knees more.
Modification: No chair? Use a countertop. Or simply fold as far as you can with bent knees, hands on your shins.
Breath cue: Exhale as you fold, inhale as you lengthen your spine.
5. Low Lunge (Anjaneyasana) with Chair Support
Alignment cue: Step your right foot forward between your hands (or use the chair to support your front thigh). Keep your back knee on the floor (or on a towel). Lift your chest and press your hips forward. Keep your front knee directly above your ankle.
Common mistake: Letting the front knee slide forward past the toes, which strains the knee joint. Also, collapsing into the lower back instead of using the core.
Modification: If your back knee hurts, place a folded towel under it. For a deeper hip opener, place your hands on the chair seat and gently press your hips forward.
Breath cue: Inhale as you lift your chest, exhale as you sink your hips.
6. Seated Cat-Cow (Chair Version)
Alignment cue: Sit on the edge of a chair, feet flat on the floor. Place your hands on your knees. Inhale, arch your spine and open your chest. Exhale, round your spine and tuck your chin. This is a great way to mobilize the spine without weight on the wrists.
Common mistake: Moving too fast or using only the upper back. Try to initiate the movement from your pelvis.
Modification: None needed - this is already a modification.
Breath cue: Inhale arch, exhale round.
7. Seated Figure-Four Stretch (Piriformis Stretch)
Alignment cue: Still seated, cross your right ankle over your left knee. Keep your right foot flexed to protect the knee. Gently lean forward if you want more stretch. Keep your spine long.
Common mistake: Pulling the ankle too far up the thigh, which can strain the knee. Keep the ankle at or above the knee, not higher.
Modification: If the cross-legged position is uncomfortable for your knee, place your right foot on the floor slightly outside your left knee, and twist your torso toward the right.
Breath cue: Exhale as you lean forward, inhale as you sit tall.
8. Thread the Needle (Parshva Balasana variation)
Alignment cue: From hands and knees, slide your right arm under your left arm, palm up, resting your right shoulder and ear on the mat. Keep your left hand on the mat for support. This opens the upper back and shoulders.
Common mistake: Pushing the head too far into the mat or collapsing the chest. Keep the weight on your shoulder, not your neck.
Modification: Place a folded towel under your head for support. Or skip the floor and do a seated version: cross one arm across your body and gently pull it with the other hand.
Breath cue: Breathe into the space between your shoulder blades.
9. Supine Twist (Supta Matsyendrasana)
Alignment cue: Lie on your back. Hug your right knee into your chest, then twist it across your body to the left. Keep both shoulders on the mat. Turn your head to the right or left, whichever feels better.
Common mistake: Lifting the top shoulder off the mat. Place a towel under your bottom knee if it does not reach the floor comfortably.
Modification: Keep your right leg bent and place your left hand on your right knee to guide the twist. For a gentler version, keep both legs straight and twist from the hips.
Breath cue: Exhale as you twist, inhale as you return to center.
10. Savasana (Corpse Pose) - 1 Minute
Alignment cue: Lie flat on your back, legs slightly apart, arms at your sides with palms up. Close your eyes. Let your body sink into the mat. This is the most important pose for resetting the nervous system.
Common mistake: Skipping it or getting up immediately. Even 60 seconds of stillness helps consolidate the benefits of the previous poses.
Modification: Place a rolled towel under your knees if your lower back feels strained. Cover yourself with a blanket if you tend to get cold.
Breath cue: Breathe naturally, noticing the rise and fall of your belly.
Common Beginner Mistakes and How to Fix Them
Beyond the pose-specific mistakes, I want to address three overarching errors that beginners often make when doing a 10-minute yoga routine at home.
Mistake 1: Holding Your Breath
Most people unconsciously hold their breath when they are concentrating on alignment. This creates tension. The fix is simple: pair each movement with an inhale or exhale as I have listed above. If you lose track, just breathe audibly through your nose - that will keep you present.
Mistake 2: Comparing Yourself to the Instructor
In videos, the instructor may have their heels flat on the floor in Downward Dog. You might not. That is fine. According to the National Center for Complementary and Integrative Health, yoga is about individual body awareness, not achieving a perfect shape. Bending your knees is not a cheat; it is smart alignment.
Mistake 3: Rushing Through the Sequence
Ten minutes is short, but that does not mean you should speed through each pose like a race. The goal is to feel each stretch, not to finish. If you find yourself rushing, pause and take an extra breath in Child's Pose.
How to Progress After Two Weeks
After repeating this routine for two weeks (daily or every other day), your body will start to adapt. You may notice your hamstrings feel looser, your shoulders less tight, and your balance improves. At that point, you can add these three poses to the sequence, one at a time, replacing an existing pose or adding them at the end.
- Warrior II (Virabhadrasana II): After Downward Dog, step your right foot forward between your hands and turn your left foot out 45 degrees. Bend your right knee to 90 degrees, keep your arms parallel to the floor. This strengthens the legs and opens the hips. Common mistake: leaning the torso forward. Keep your shoulders stacked over your hips.
- Bridge Pose (Setu Bandha Sarvangasana): Lie on your back, knees bent, feet flat. Press your hips up toward the ceiling. This strengthens the glutes and opens the chest. Common mistake: pushing the hips too high, which strains the lower back. Keep your weight on your shoulders, not your neck.
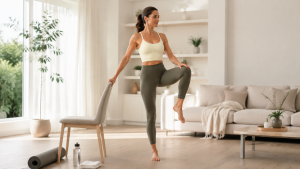
- Tree Pose (Vrikshasana): Stand next to a wall for support. Shift weight to your left foot, place the sole of your right foot on your left ankle, calf, or thigh (never on the knee). This improves balance and focus. Common mistake: gripping the floor with the toes. Instead, press down evenly through your standing foot.
Incorporate these gradually. For example, after your first two weeks, replace the Seated Figure-Four with Warrior II for one week, then add Bridge Pose after Savasana, then Tree Pose after the standing forward fold.
Why This Routine Works for Desk Workers
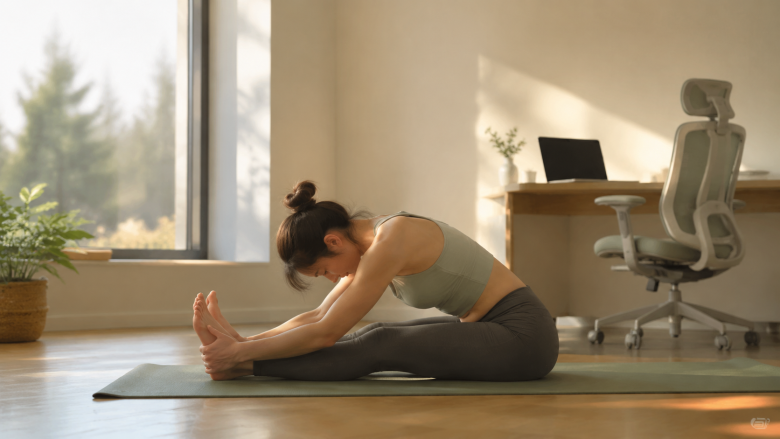
Desk workers have a unique set of tension patterns: rounded shoulders, forward head posture, tight hip flexors, and weak glutes. This routine specifically targets those areas. The Cat-Cow mobilizes the spine you have held in a static position all day. The Downward Dog with bent knees stretches the hamstrings without aggravating the lower back. The Seated Figure-Four opens the hips that have been compressed by sitting.
Most people do not realize that tight hips can cause lower back pain, and tight shoulders can cause tension headaches. By addressing these areas in just 10 minutes, you can interrupt the cycle of discomfort before it becomes chronic. This is not a silver bullet - you still need to get up and walk every hour, drink water, and adjust your workstation ergonomics. But this routine is a powerful tool to have in your toolkit.
If you want to build a more comprehensive morning routine, check out our How to Build a Calming Morning Routine at Home - it includes a similar 10-minute yoga practice as part of a larger framework for starting your day with intention.
Your Next Step
Print this guide, bookmark it, or save it on your phone. Start today. Do the routine once, and notice how your body feels afterward. The next day, do it again. After two weeks, you will be ready for the three extra poses. And if you ever feel pain (not just discomfort), stop and modify. Yoga is a practice, not a performance.
For a deeper dive into morning movement, see our article on Easy 10-Minute Morning Routine for Better Focus - it complements this yoga flow with breathwork and mindfulness techniques.